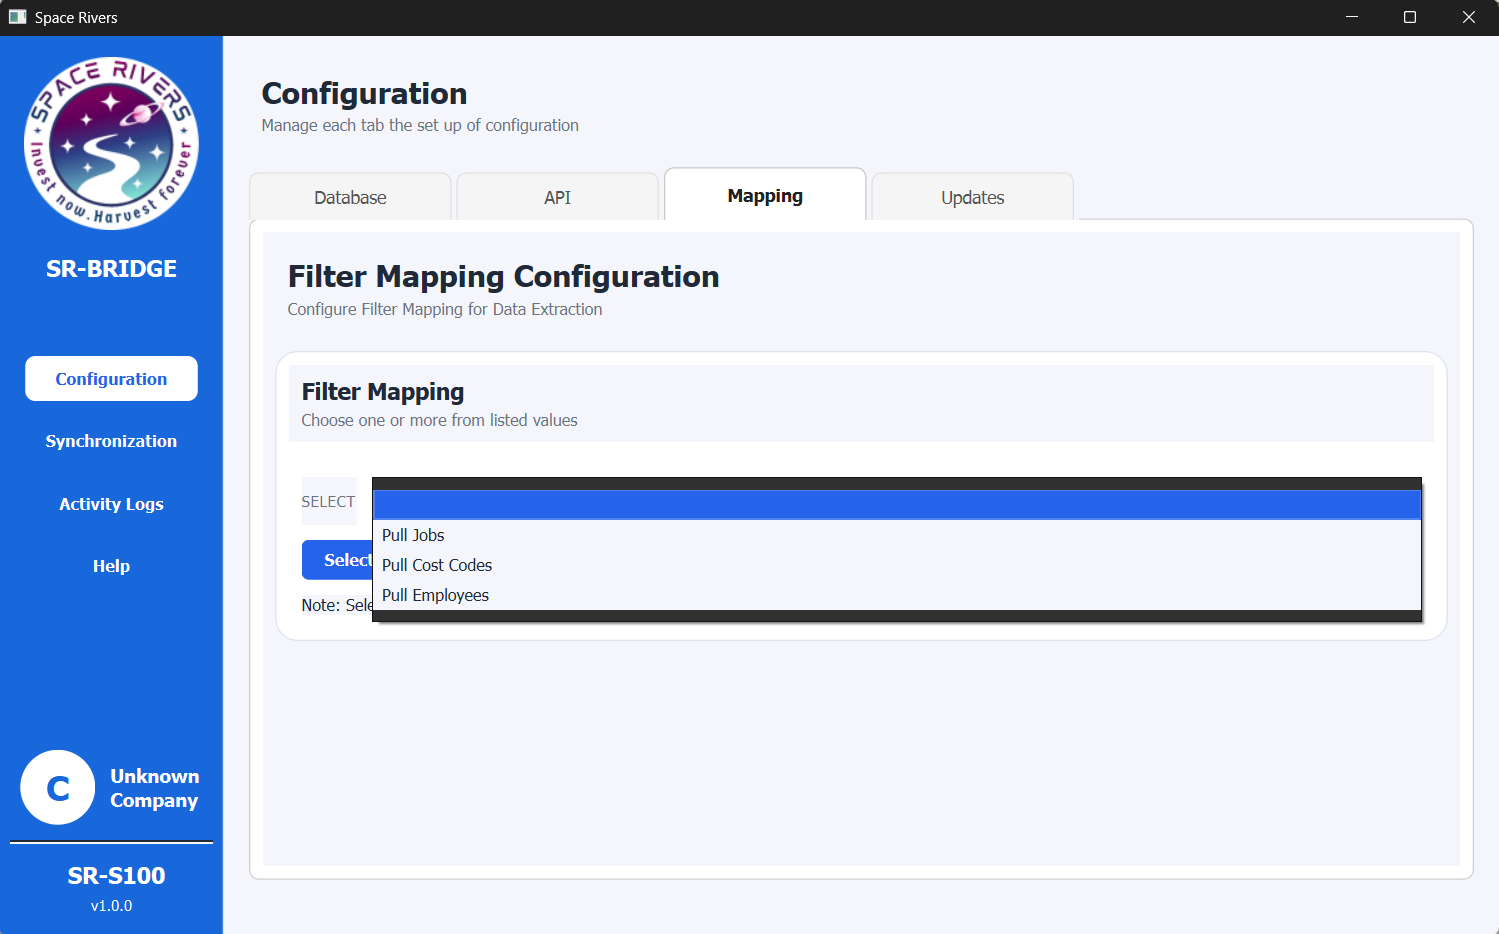
Filter Mapping Configuration
Introduction
The Mapping tab is where you choose which data groups SR-BRIDGE should include in the pull or mapping process.
Use this page to decide what data SR-BRIDGE should bring in for the current workflow.
Overview
This page lets you choose one or more mapping options before the next extraction or synchronization run.
If the controls are read-only, turn on Enable editing first.
Purpose of this tab
This tab is used to:
- Choose one or more data groups
- Confirm the selection with Select
- Decide which records should be included in the extraction process
Field explanation
Enable editing
Turn on Enable editing before changing the mapping options.
The list can only be changed after editing is enabled.
Select
Use the Select button and the list beside it to choose the mapping options you want.
The available options shown in the list are:
- Pull Jobs
- Pull Cost Codes
- Pull Employees
These options tell SR-BRIDGE which data groups to include in the pull.
Pull Jobs
Choose this when you want job records included.
Available job status values:
- Bid
- Refused
- Contract
- Current
- Complete
- Closed
Pull Cost Codes
Choose this when you want cost code records included.
Available cost code status values:
- Active
- Inactive
Pull Employees
Choose this when you want employee records included.
Available employee status values:
- Current
- On leave
- Quit
- Laid off
- Terminated
- On probation
- Deceased
- Retired
Multiple selections
You can select more than one option when the workflow needs multiple data groups.
If you only need a specific set of records, choose only those options to keep the run focused.
Step-by-step setup
- Open the SR-BRIDGE desktop app.
- Go to Configuration in the left menu.
- Open the Mapping tab.
- Select Enable editing.
- Open the Select list.
- Choose one or more mapping options based on the data you want to include.
- Confirm the selection.
- Review the selected items before starting synchronization or extraction.
How to confirm setup
The key action on this tab is to choose the right mapping options and confirm them with Select.
If you only need one data type, choose one option.
If your workflow needs several data types, select all the relevant options before confirming.
Notes and Tips
- Enable editing before making changes.
- Select only the data you actually need for the current workflow.
- Choosing fewer options keeps the extraction focused and easier to review.
- Choosing more options is useful when the sync needs multiple master data sets together.
- Recheck the selection if the next run does not include the data you expected.
Troubleshooting
The list does not open
Check that Enable editing is selected first.
The wrong data is being included
Reopen the list and make sure the correct options are selected before continuing.
No data appears later in the workflow
Confirm that you selected the right mapping options for the data you want to pull.