API Configuration
Introduction
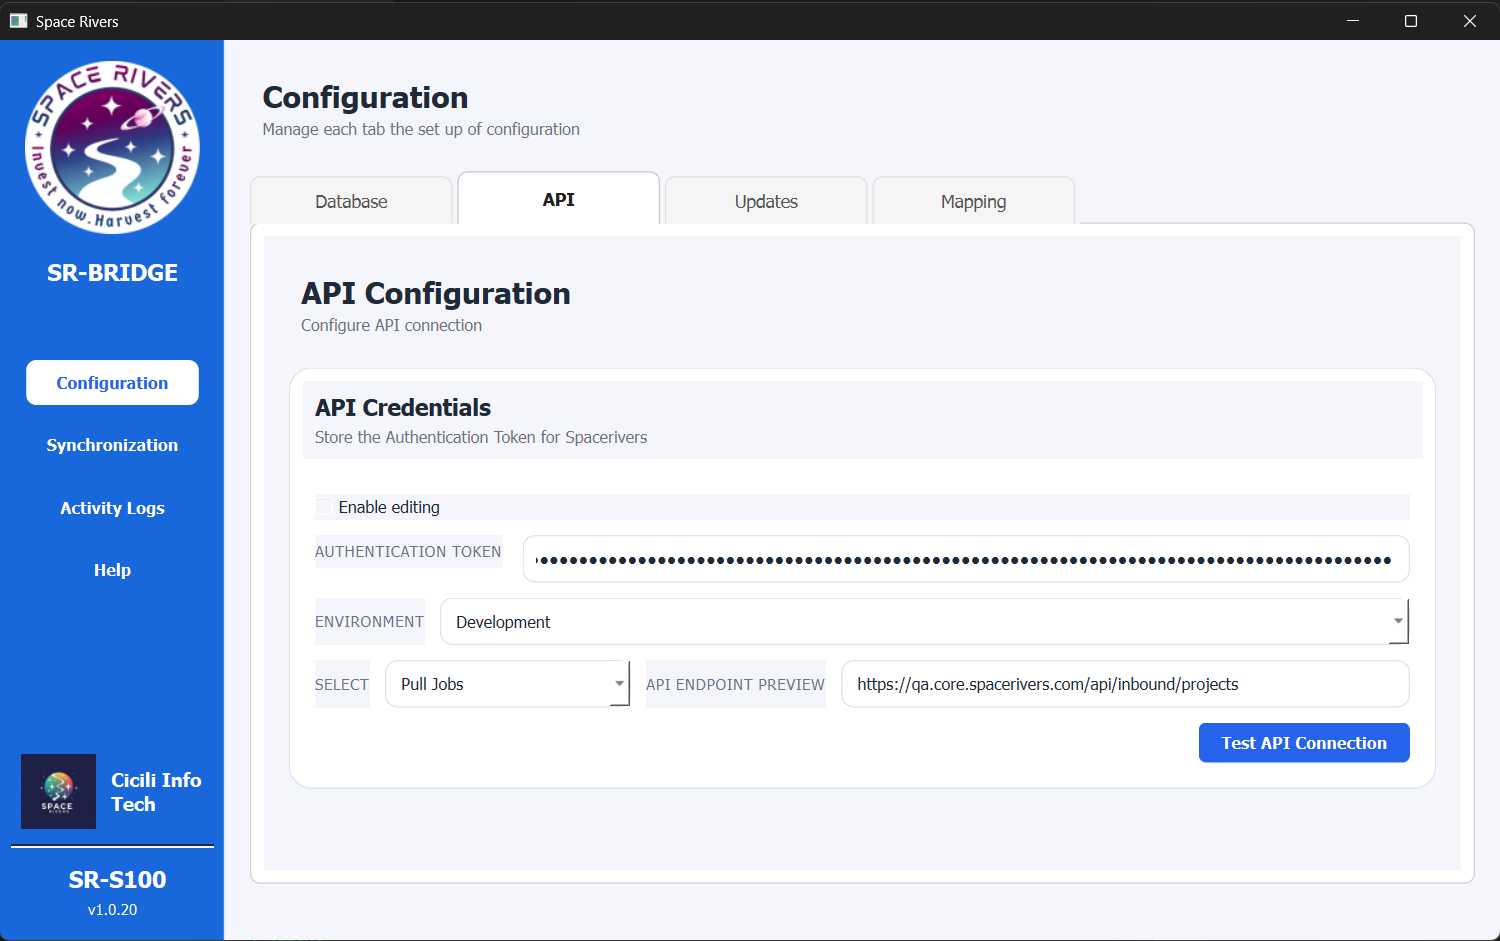
The API tab is where you set up SR-BRIDGE to connect to the Space Rivers API.
Use this page to enter the token, choose the correct environment, select the API mode, and confirm the endpoint before you continue.
Overview
This page tells SR-BRIDGE which API details to use for communication.
If the fields are locked, turn on Enable editing first.
Purpose of this tab
This tab is used to:
- Store the authentication token
- Choose the correct environment
- Select the API action or mode
- Review the API endpoint preview
- Check whether the API connection is working
Field explanation
Enable editing
Turn on Enable editing before changing the token or any dropdown value.
When editing is off, the API fields stay read-only.
Authentication Token
Enter the authentication token provided for your Space Rivers API access.
This token identifies the desktop app when it calls the API. Paste it carefully and keep it private.
Environment
Choose the environment that matches your setup.
For example, select the test, QA, or live environment that your organization is using.
Select
Use the Select list to choose the API action or mode.
In the current screen, the selected option is Pull Jobs. Other options may include cost codes, employees, or other supported data actions.
API Endpoint Preview
The API Endpoint Preview shows the final API address SR-BRIDGE will call.
Use it to check that the selected environment and mode point to the correct server and path.
Test API Connection
Click Test API Connection after the token, environment, and mode are filled in.
This confirms that the app can reach the API with the settings you entered.
Step-by-step setup
- Open the SR-BRIDGE desktop app.
- Go to Configuration in the left menu.
- Open the API tab.
- Select Enable editing.
- Enter the authentication token.
- Choose the correct environment.
- Open the Select list and choose the API action or mode you need.
- Check the API Endpoint Preview to make sure it matches your target endpoint.
- Click Test API Connection.
How to confirm setup
Always review the endpoint preview before testing. Then use Test API Connection to confirm that:
- The token is accepted
- The chosen environment is correct
- The selected mode matches the data you want to pull
- The endpoint preview points to the right API location
When the test passes, the API setup is ready.
Notes and Tips
- Enable editing before changing the token or dropdown values.
- Keep the authentication token secure.
- Use the environment that matches the system you are connecting to.
- Review the endpoint preview whenever you change the environment or mode.
- If you are unsure which mode to choose, confirm it before testing.
Troubleshooting
The API test fails
Check the following:
- Editing is enabled
- The token is pasted correctly
- The environment is correct
- The selected mode is the one you intended
- The endpoint preview matches the expected server
The endpoint preview looks wrong
Recheck the environment and the selected API action or mode.
The preview should update when you change the selection. If it does not, refresh the configuration and check the values again.
The token is rejected
Make sure the token is current, copied without extra spaces, and issued for the correct environment.